Water or Soil?
For most Australian indoor gardeners, water propagation is a good starting point for most people. It allows you to visually monitor root health and easily spot rot before it kills the cutting. Soil propagation, while skipping the transplant-shock phase, requires precise moisture management that many beginners struggle to get right in variable Australian climates.
Why Your Devil’s Ivy Cuttings Are Dying
If you’ve ever placed a Devil’s Ivy cutting in a jar of water only to watch the stem turn black, slimy, and mushy within two weeks, a few common mistakes are usually behind it:
- You cut in the wrong place: Snipping a leaf by its stem will not grow roots. You must include a node (the small brown bump on the main vine).
- You are suffocating the cutting: Leaving the same tap water in a jar for a month depletes oxygen, which can lead to rot.
- You left leaves submerged: Any foliage sitting below the water line will rot and foul the water.
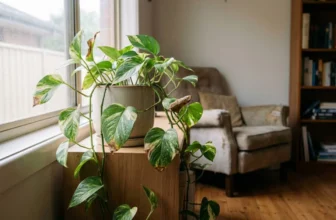
Devil’s Ivy (Epipremnum aureum) propagates readily from stem sections that include a healthy node. Whether you are fixing a leggy plant, saving a dying vine, or multiplying your collection for free, this guide cuts out the guesswork.
Before You Start (Tools You'll Need)
Setting yourself up for success starts with the right equipment. You don’t need a professional greenhouse, but having these items ready will drastically improve your success rate:
- Sharp secateurs or plant snips (Clean cuts prevent rot).
- Clear propagation jar (For water propagation).
- Indoor potting mix (A premium, free-draining brand).
- Perlite (To add essential drainage).
- Rooting hormone (Optional — Devil’s Ivy roots readily without it).
- Gloves (To protect your hands, as the sap contains calcium oxalate).
- Spray bottle (For gentle watering).
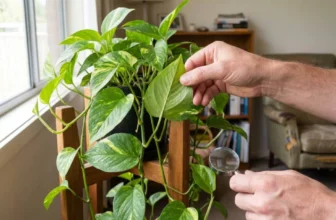
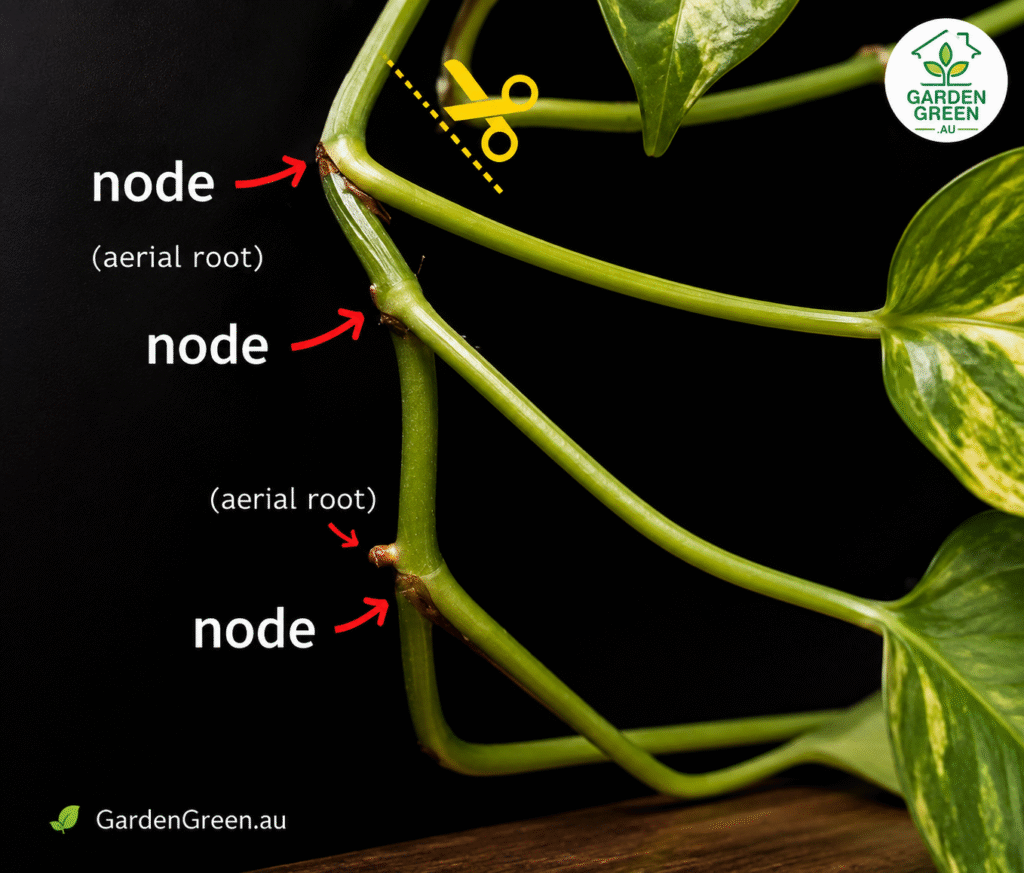
Understanding the Node: The Golden Rule
The most important step in propagating Devil’s Ivy is knowing exactly where to make your cut. You cannot simply snip off a leaf by its stem and expect it to grow roots.
A cutting must contain a node.
The node is the small, slightly swollen bump or joint on the main vine where a leaf attaches. Scientifically, nodes contain meristematic tissue—plant cells capable of producing new roots when stimulated by natural plant hormones called auxins.
In your home, this is the exact spot where new water or soil roots will emerge.
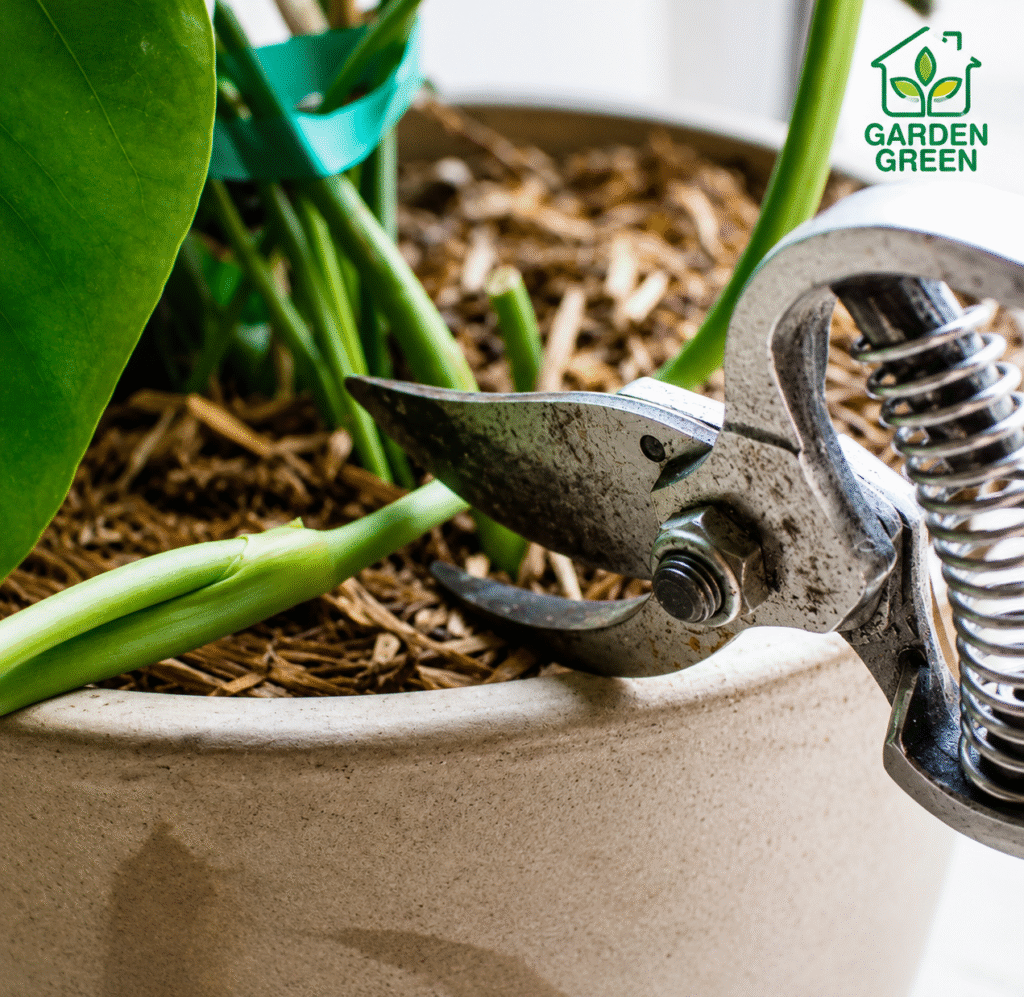
How to make the cut:
- Sanitise your secateurs with rubbing alcohol.
- Locate a healthy vine with plump, vibrant leaves.
- Find a node, and make a clean, angled cut about 1 to 2 centimetres below it.
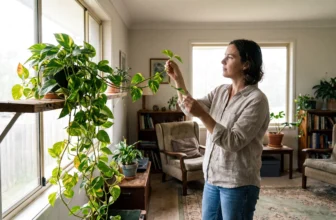
- If your cutting has multiple leaves near the bottom, strip the lowest leaf off so you have a bare section of stem with an exposed node. (Leaves left submerged in water or buried in soil will simply rot).
Method 1: Water Propagation (Step-by-Step)
Water propagation is the most popular method for beginners because you can watch the root development in real-time.
- Step 1: Place your prepared cutting into a clear glass jar.
- Step 2: Fill it with room-temperature water. Ordinary tap water is generally suitable, and leaving it out overnight does not remove most dissolved minerals. Ensure the node is submerged, but keep the leaves above the water line.
- Step 3: Place the jar in a warm spot with bright, indirect light (like an east-facing window). Keep it away from heaters or direct air conditioner drafts.
The Maintenance: Cloudy water, decaying submerged tissue and poor hygiene can contribute to cutting decline. Monitor the water and replace it when its condition deteriorates rather than following a rigid schedule.
Replace the water when it becomes cloudy, develops an odour, or collects decaying material. In clean conditions it may remain usable longer, while warm rooms or decomposing tissue may require more frequent changes. In warmer parts of Australia during summer, water may need changing more often because it warms up and stagnates quickly.
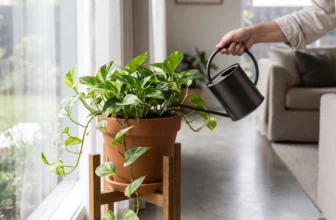
Method 2: Soil Propagation (Step-by-Step)
While water propagation is fun to watch, roots grown in water are structurally different from roots grown in soil. Moving a water-propagated plant into soil later can cause a brief check in growth while it adjusts. Propagating directly into soil avoids that transition.
- Step 1: Take your cutting and optionally dip the bare node in a rooting hormone powder.
- Step 2: Fill a small pot suited to the cutting and its root mass with a free-draining propagation mix (the exact ratio depends on how much water your base potting mix holds).
- Step 3: Poke a hole in the soil with a pencil and insert the cutting, burying the node completely.
- Step 4: Press the soil gently around the stem and mist lightly with a spray bottle.
Expanded Water vs. Soil Comparison
Root Development: What to Expect
Rooting speed varies with temperature, light, the health of the cutting and the method used. Rather than a week-by-week timetable, these are the stages you will see, in order:
- First: the cut end calluses over.
- Then: tiny white “nubs” or short roots appear at the node.
- Next: those roots lengthen.
- After that: secondary roots (fine hairs branching off the main roots) begin to appear.
- Finally: ready for potting once the root system looks established — see the signs below.
When to Pot Up: Don’t just rely on length. The signs that your cutting is ready for soil include multiple healthy roots, the presence of secondary branching roots, firm/white root tissue, and occasionally, new leaf growth starting at the top.

When Propagation Is Usually Easiest Around Australia
While indoor plants are somewhat insulated, they still respond to the natural light cycle and ambient temperatures of your home. Winter growth slows significantly, and heatwaves can stress delicate cuttings.
These are broad seasonal guides, not fixed windows. Indoor warmth, available light and the condition of the cutting matter more than the month on the calendar.
| Australian Region | Best Time to Propagate Devil’s Ivy |
|---|---|
| Sydney (NSW) | Spring to early autumn |
| Melbourne (VIC) | Spring and summer |
| Brisbane (QLD) | Much of the year in warm, bright indoor conditions |
| Perth (WA) | Spring and early summer |
| Adelaide (SA) | Spring to early autumn |
| Hobart (TAS) | Late spring and summer |
During summer, be sure to keep your parent plant healthy too. Read our guide on fixing leggy Devil’s Ivy vines and training Devil’s Ivy to climb.
7 Common Propagation Mistakes
- Cutting above the node instead of below it (resulting in a node-less stem that will not root).
- Keeping leaves above the waterline. Submerged leaf tissue is more likely to deteriorate and may foul the water, but rot is not necessarily immediate.
- Using dirty scissors, transferring bacteria to the fresh cut.
- Changing water too rarely, depriving the roots of oxygen.
- Keeping cuttings in direct afternoon sun, which boils the water in the jar.
- Potting into dense garden soil, suffocating the delicate new roots.
- Moving the cutting too much before roots can establish a grip.
Troubleshooting: Why Isn’t My Cutting Growing?
- Stem turning black/mushy: Root rot. You likely didn’t use clean secateurs, or you left a leaf in the water. Cut away the black portion (if there’s a node left higher up) and start fresh.
- Leaves turning yellow: Usually a sign of too much direct light or lack of nutrients if it’s been in water for months.
- No roots after 4 weeks: Likely too cold (especially in southern states during winter) or not enough indirect light.
- Mould in water/slimy stem: The water has stagnated. Wash the jar with soap, rinse the cutting gently, and refill with fresh water.
Can Devil’s Ivy Live Permanently in Water?
Yes, it absolutely can! This is a very popular decorative hydroponic setup. However, water alone doesn’t contain the nutrients the plant needs long-term.
To keep it alive permanently in water, you must provide nutrients by adding a tiny drop of liquid indoor plant fertiliser to the jar once a month. Keep in mind that growth will usually be slower than a plant established in soil.
Can I Propagate Every Variety?
Yes! The propagation method is identical whether you have a standard Golden Pothos, a Marble Queen, Neon, Snow Queen, N’Joy, or Manjula. (Note: Satin Pothos, or Scindapsus pictus, is not a true Pothos, but it propagates using the exact same node-cutting method).
Our Recommended Propagation Kit
If you want to upgrade from old jam jars to a dedicated setup, here is what we recommend for Australian homes:
- Propagation Station: A wooden stand with glass bulbs (looks great on a windowsill).
- Pruning Snips: Small, sharp bypass secateurs.
- Rooting hormone (optional): Devil’s Ivy commonly forms roots without it, so use it only if you already have a suitable product and follow its label.
- Indoor Potting Mix & Perlite: For the perfect airy mix.
Important FAQS: How to Propagate Devil’s Ivy:
Can I propagate Devil’s Ivy from just a leaf?
No, a leaf without a node won’t produce a new vine. You need an intact node (the small bump on the stem) to grow proper roots and shoots.
Why are my cuttings rotting in water instead of rooting?
In warm weather, water loses oxygen quickly. If you aren’t changing the water every few days, cuttings can suffocate and rot. Choose a healthy cutting that includes at least one node and enough stem to handle it without damaging the node — the exact length matters less than node health and leaf condition.
Can I use tap water to propagate?
Ordinary tap water is generally suitable. Rainwater may also work well, but it is not required, and leaving tap water overnight does not remove most dissolved minerals. Water from some salt-based domestic softeners may contain elevated sodium, so untreated tap water or another suitable source is usually the safer choice.
How long does water propagation actually take?
Rooting time varies with light, temperature, cutting health and method. Look for healthy roots emerging from the node rather than relying on a fixed number of weeks. Warm, stable indoor conditions usually support faster rooting than cool, dark conditions, but there is no single temperature that guarantees success.
Do my cuttings need fertiliser while sitting in water?
Plain water holds few nutrients, so a very dilute liquid fertiliser can help cuttings held in water for a long period. Follow the product label and err on the weak side — cuttings need far less than an established plant.
The roots look brown and mushy. What do I do?
Remove the cutting from the water or mix and inspect the stem and roots. Trim only tissue that is clearly soft, dark or decayed, using clean tools. Keep the healthy node and firm roots, then restart the cutting in clean water or fresh, free-draining mix. This guide does not recommend hydrogen peroxide as a routine root treatment. For an established plant, see our root rot guide.
Responsible Disposal of Cuttings and Propagation Water
Devil’s Ivy can regrow from viable stem sections containing nodes. That is exactly what makes it easy to propagate — and it is also why surplus material needs to be disposed of thoughtfully.
- Do not dump surplus cuttings, failed propagation pieces or rooted nodes in bushland, waterways, vacant land or garden soil, where they may establish.
- Seal unwanted viable material for disposal, or follow your council’s current garden-waste guidance.
- Tip used propagation water into an indoor sink or toilet connected to the wastewater system — not into stormwater drains, creeks or natural areas.
For the full picture on outdoor growing, environmental risk and disposal, see is Devil’s Ivy a weed in Australia?
New to this plant, or want the full picture on light, watering and feeding? Start with our complete Devil’s Ivy care guide for Australia.